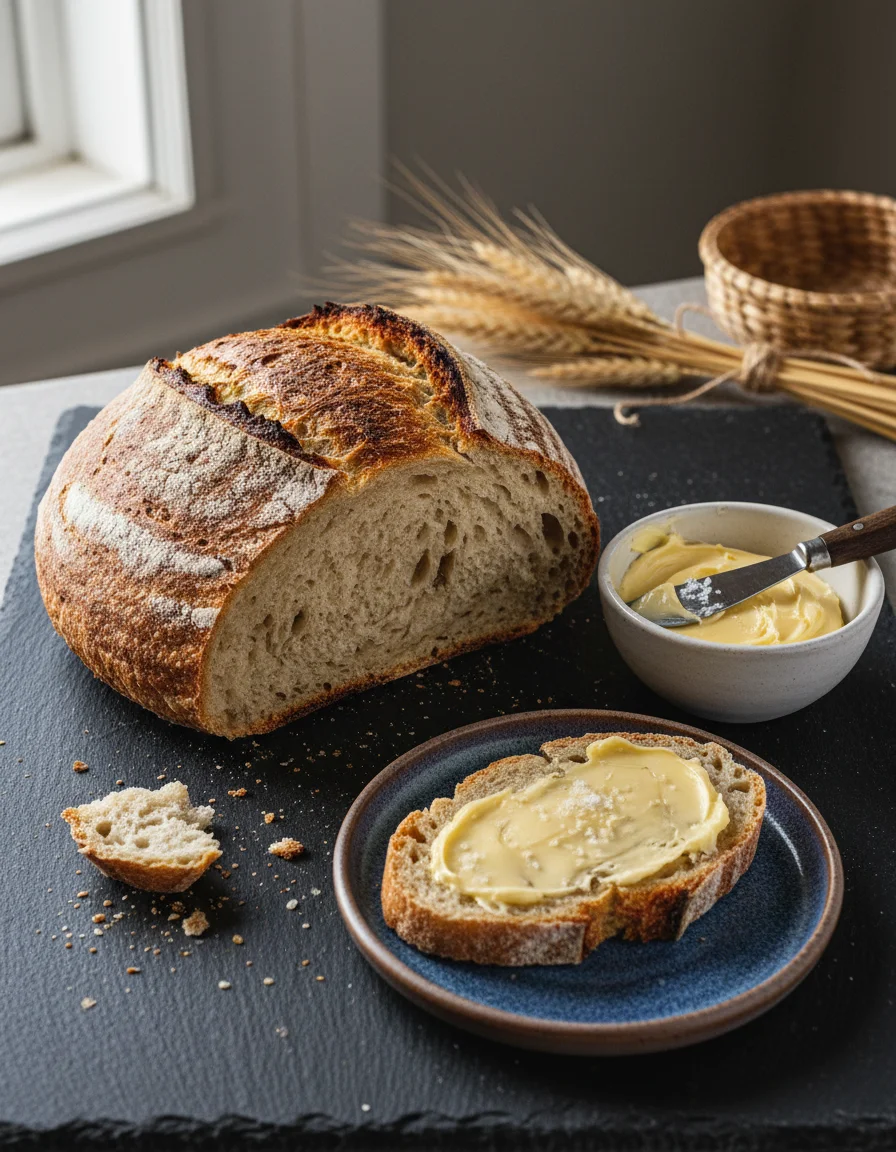
Wild Yeast Bread
This impressive gluten-free, vegan wild yeast bread recipe yields a gorgeous loaf with a fantastic structure, using only ten ingredients. It's an excellent option for those seeking plant-based and allergen-friendly bread with gut-friendly benefits.
Price per Serving
Instructions
- 1
Before you begin, watch the Wild Yeast Bread How-To Video!
- 2
The night before baking, refresh your refrigerated starter with brown rice flour (0.25 cup) and enough [water] to stir. Cover and let sit at room temperature overnight.
- 3
The morning of baking, feed your starter using one of the methods below:
- 4
Method 1: Feed your starter directly into its jar (approx. 950ml). If the jar has at least gluten free sourdough starter (150 g), add brown rice flour (1 cup) (125g) and 1 cup water (0.75 to) (177g to 240g). Mix well and let it become active and bubbly (approx. 2-4 hours). Add gluten free sourdough starter (2 cups) (approx. 515g) to the bread ingredients once active.
- 5
Method 2: Remove gluten free sourdough starter (0.5 cup) (150g) into a medium bowl. Feed with brown rice flour (1 cup) (125g) and 1 cup water (0.75 to) (177g to 240g). Mix, cover, and let activate (can take up to 10 hours). This method creates about gluten free sourdough starter (2 cups) of thin, bubbly starter. Add to bread ingredients when active.
- 6
Proceed with Step 3 once your starter is ready.
- 7
Combine whole psyllium husk (0.33 cup) (or powder) and golden flaxseed meal (0.33 cup) (or ground flax), then add warm water (1.5 cups). Mix well until it thickens and gels. Set aside while preparing other bread ingredients.
- 8
To a stand mixer bowl, sift and combine sorghum flour (1.25 cup), light buckwheat flour (0.5 cup), white rice flour (0.5 cup), arrowroot starch (0.5 cup), potato starch (0.5 cup), coconut palm sugar (1 tbsp) (optional), and fine grey sea salt (1 tbsp). Briefly mix dry ingredients by hand. Pour in the active [gluten free sourdough starter] and the prepared gel mixture. Mix on low for about minute (1). If the dough is too stiff, gradually add 0.5 cup water (0.25 to) until well combined and pliable, but not sticky. Mixing should take a few minutes.
- 9
Transfer the dough to a [brown rice flour]-dusted flat surface. Gently stretch and fold a few times without overworking. Shape into a round. Place the dough ball into a [brown rice flour]-dusted banneton basket or a soup bowl lined with a floured tea towel. Cover with a plastic bag to aid rising. Let rise in a warm place for 4-6 hours (less time in warmer months). Check rise after 3 hours; if it has grown about inch (1) and bounces back when gently pressed, it's ready. Preheat your oven to 450° F (230°C) with a 5-7QT Dutch oven inside for at least minutes (30) before baking.
- 10
Once the oven is hot, remove the preheated Dutch oven carefully. Transfer the dough onto a 10x13-inch sheet of [unbleached parchment paper], dust with more [brown rice flour] if desired, and score with a bread scoring lame or sharp knife (main scoreline 0.25-inch deep, decorative lines 0.125-inch deep). Using the [unbleached parchment paper], transfer the dough to the Dutch oven. Add a few [ice cubes] or spray a mist of [water] under the parchment paper for steam. Cover and bake for minutes (25) covered, then minutes (25) uncovered, and finally minutes (10) directly on the middle rack. Tap the loaf; if it sounds hard and hollow, it's ready.
- 11
Cool the loaf on a wire rack for 6 hours or overnight to set the crumb and reduce stickiness. Slice and enjoy fresh or toasted. Store wrapped in a clean towel for a day, then slice leftovers and refrigerate or freeze.
Nutrition Facts
Per portion
Macronutrients
Micronutrients
Reviews
Be the first to review this recipe!
Rate this recipe:
No reviews yet. Be the first to share your experience!
Similar Recipes